The kitchen is the heart of the home, and a well-functioning sink is central to kitchen operations. When it comes to plumbing, the choice of materials can greatly influence the longevity and efficiency of your kitchen sink. Acrylonitrile Butadiene Styrene, or ABS, is a preferred material for many DIY enthusiasts due to its durability and ease of installation. This blog will navigate the intricacies of installing or replacing kitchen sink pipes using ABS, offering tips and insights for a successful DIY project.
Why Choose ABS for Kitchen Plumbing?
ABS piping is known for its toughness, making it less prone to breakage compared to other materials. It’s also resistant to a wide range of temperatures and less affected by harsh chemicals, which means it can endure the demanding environment of a kitchen sink. Moreover, ABS pipes are lightweight and easy to cut and fit, making them ideal for DIY plumbing projects.
Gathering the Right Tools and Materials
Before beginning your project, ensure you have all the necessary tools and materials. This includes ABS pipes of the correct diameter, ABS-specific fittings (elbows, couplings, and adaptors), a fine-tooth saw or pipe cutter, ABS cement, primer, and sandpaper. Also, consider safety equipment like gloves and goggles, as you’ll be working with chemicals and small particles.
Steps to a Successful ABS Installation
- Measuring and Cutting: Measure the area under your sink and plan the pipe layout. Use a fine-tooth saw or pipe cutter to cut the ABS pipe to the desired length.
- Dry Fitting and Planning: Lay out all the pieces in the proposed configuration under the sink without cement. This step is vital to ensure that all pieces fit correctly and to make any necessary adjustments.
- Cleaning and Priming: Once the layout is confirmed, clean all the edges of the pipes and fittings with sandpaper, then apply a layer of ABS primer to prepare the surfaces.
- Gluing and Assembling: Apply ABS cement to both the pipe and the fitting, then press and twist them together. Ensure a tight fit and hold for a few seconds to allow the cement to set.
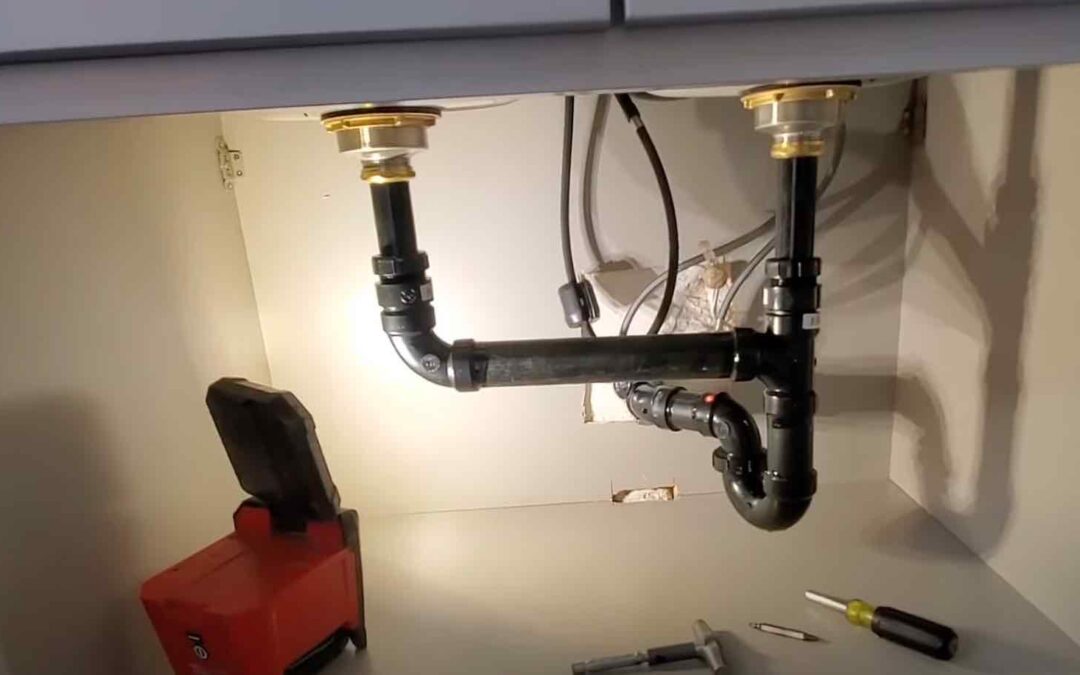
- Setting the P-Trap: Install the P-trap, which is crucial for preventing sewer gases from entering your home and catching debris. Make sure it’s at the appropriate height and angle.
- Leak Testing: After the installation, check for leaks by running water through the pipes. Look for any drips or moisture at the joints.
Creative Insights for Enhanced Functionality
- Visual Inspection Ports: Consider installing inspection ports or cleanouts in strategic locations for easier maintenance and troubleshooting.
- Insulation for Temperature Control: If your kitchen is subject to temperature variations, insulating the ABS pipes can prevent condensation and maintain a consistent temperature.
- Regular Maintenance: Even after successful installation, periodically check the pipes for any signs of wear or leaks, ensuring the longevity of your plumbing.
Conclusion
Installing or upgrading your kitchen sink with ABS piping can be a rewarding DIY project that improves the functionality and longevity of your kitchen. With the right preparation, tools, and attention to detail, you can achieve a professional-quality plumbing system. Remember to always prioritize safety and consult a professional if you encounter complex issues. Embrace the challenge, and enjoy the satisfaction of enhancing your kitchen with your own hands!