Earthquake valves are crucial safety devices designed to protect your home or business from gas leaks during seismic events. If you have a 1 1/4″ Little Firefighter Earthquake Valve that needs replacing, it’s essential to understand the process involved. In this blog, we will provide a step-by-step guide on how to replace a 1 1/4″ Little Firefighter Earthquake Valve, ensuring the safety and peace of mind for you and your property.
Gather the Necessary Tools and Materials
Before you begin the replacement process, gather the necessary tools and materials. This includes a pipe wrench, adjustable wrench, Teflon tape, pipe cutter, replacement valve, and a bucket or container to catch any water or gas that may be released during the process. Ensuring you have everything on hand will make the replacement process smoother.
Shut Off the Gas Supply
The first step in replacing the earthquake valve is to shut off the gas supply. Locate the gas meter and turn the valve clockwise until it is fully closed. This step is crucial to ensure safety during the replacement process and prevent any gas leaks.
Release Pressure from the Line
To release any pressure in the gas line, open a nearby gas appliance, such as a stove burner, for a few seconds. This will allow any remaining gas in the line to escape before you proceed with the replacement.
Disconnect the Existing Earthquake Valve
Using the pipe wrench and adjustable wrench, carefully disconnect the existing earthquake valve from the gas line. Loosen the nuts connecting the valve to the gas line and remove the valve from the pipe.
Prepare the Pipe and Install the New Valve
Use the pipe cutter to remove any damaged or corroded sections of the pipe. Ensure that the pipe is clean and free from any debris. Apply Teflon tape to the threaded ends of the pipe, which will help create a secure seal. Install the new 1 1/4″ Little Firefighter Earthquake Valve onto the pipe, tightening the nuts with the pipe wrench and adjustable wrench.
Test for Leaks
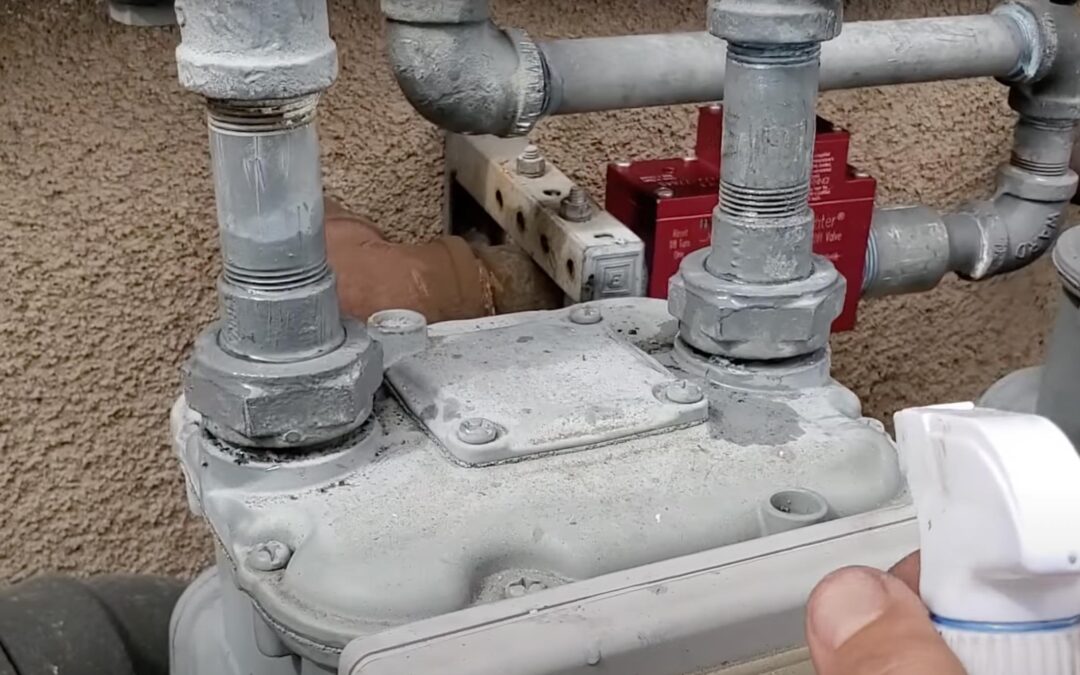
Once the new valve is securely in place, it’s important to test for any potential leaks. Turn the gas supply back on and apply a soapy water solution to the valve connections. If you notice any bubbles forming, it indicates a leak. In such cases, tighten the connections further or seek professional assistance to ensure a proper seal.
Restore Gas Supply and Conduct a Functionality Test
After confirming there are no leaks, fully open the gas supply valve. Test the functionality of the new valve by gently shaking it back and forth to simulate an earthquake. The valve should automatically shut off the gas flow, providing the necessary protection during seismic events.
Conclusion
Replacing a 1 1/4″ Little Firefighter Earthquake Valve is a task that requires careful attention to detail and adherence to safety procedures. By following the step-by-step guide outlined above, you can successfully replace the valve and ensure the safety of your property and occupants.
Remember, if you are uncomfortable with any part of the replacement process or are uncertain about gas-related tasks, it is always advisable to seek the assistance of a licensed professional. Prioritizing safety during the replacement of an earthquake valve is crucial to protect your property and provide peace of mind in the face of potential seismic events.
With the replacement of your 1 1/4″ Little Firefighter Earthquake Valve, you can rest assured that your gas line is equipped with a reliable safety device, providing an additional layer of protection for you and your loved ones.